20+ Years Experience
Specialist Epoxy Flooring
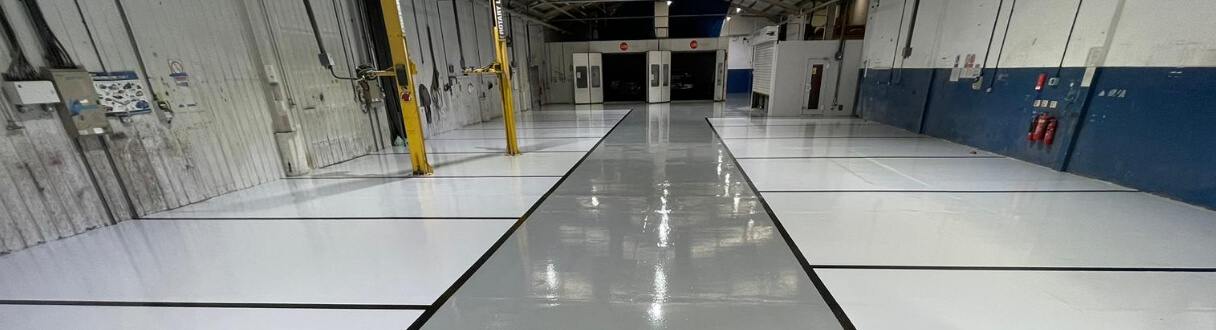
Enquire Today For A Free No Obligation Quote
Epoxy flooring is a popular choice for its durability and aesthetic appeal. However, over time, scratches and chips may appear, compromising the pristine look of the floor. Understanding the causes of these damages is crucial in effectively repairing and preventing them. Here, we will explore the common causes of scratches and chips in epoxy flooring and provide methods for repairing them.
Scratches and chips can occur due to various factors. Common causes of scratches include dragging heavy objects, sharp materials, or furniture across the floor. Chips, on the other hand, can result from the impact of dropped items or heavy objects being forcefully placed on the surface.
Before proceeding with repairs, it is essential to accurately assess the extent of the damage. Identifying scratches involves examining the surface for visible marks or abrasions. Chips, on the other hand, are characterized by small, missing sections of the epoxy coating.
To repair scratches, filling and patching techniques can be employed. This involves using epoxy filler and a putty knife to fill the scratch and achieve a smooth surface. Small chips can be fixed by applying clear epoxy resin to the affected area. For larger chips, a more extensive repair process may be required, involving scraping away the damaged epoxy and reapplying a fresh layer.
Prevention is key to maintaining the integrity of your epoxy flooring. Protective measures such as using felt pads on furniture legs and avoiding dragging heavy objects can minimize the risk of scratches and chips. Regular maintenance, including routine cleaning and periodic reapplying of epoxy top coats, can also help prevent future damage.
By understanding the causes, assessing the damage, and implementing effective repair methods and preventative measures, you can keep your epoxy flooring looking as good as new for years to come.
Scratches and chips in epoxy flooring can be a real headache. Understanding the causes is the first step towards preventing and repairing them. We’ll uncover the culprits behind these imperfections and discuss what you need to know about them. From common causes of scratches to common causes of chips, we’ll shed light on the reasons behind these flooring woes. Get ready to discover how to keep your epoxy flooring looking flawless and extend its lifespan.
Common causes of scratches in epoxy flooring include dragging heavy objects across the surface, dropping or scraping sharp objects, and using abrasive materials for cleaning. These actions can cause scratches that not only affect the appearance of the flooring but also weaken its protective layer. To prevent scratches, it is important to use furniture pads or protective mats, regularly sweep away debris, and avoid using harsh cleaning tools. For instance, a business owner who was unaware of the common causes of scratches decided to move heavy equipment across their epoxy floor without taking any protective measures. As a result, deep scratches appeared, leading to costly repairs and inconvenience to the business operations.
Common causes of chips in epoxy flooring include:
1. Heavy impact: Dropping heavy objects or tools can lead to chips in the epoxy surface.
2. Sharp objects: Dragging or scraping sharp objects across the flooring can cause chips and scratches.
3. Abrasive materials: Moving furniture or equipment without proper padding can result in chips as the items scrape against the epoxy.
4. Chemical spills: Certain chemicals can react with epoxy, causing it to weaken and chip away.
5. Poor installation: Incorrect preparation or application of the epoxy can lead to weak spots and eventual chipping.
Assessing the damage is the first step in repairing scratches and chips in epoxy flooring. We will discuss the process of identifying both scratches and chips. Whether it is a minor blemish or a more significant issue, we have expert tips and tricks to help you restore your epoxy flooring. Get ready to tackle those imperfections head-on!
To identify scratches in epoxy flooring, you can follow these steps:
1. Inspect the surface: Examine the flooring under bright lighting to identify any irregularities or changes in texture.
2. Run your fingers over the surface: Feel for any rough or uneven areas that could indicate a scratch.
3. Use a torch: Shine a light at a low angle across the floor to reveal any fine lines or marks that may be scratches.
4. Check for discolouration: Scratches may cause a change in the colour or shine of the epoxy coating.
5. Clean the floor: Remove any dirt or debris to get a clearer view of the floor’s condition.
By following these steps, you can easily identify and locate scratches on your epoxy flooring for effective repairs.
Identifying chips in epoxy flooring is essential for effective repairs and maintenance. Here are the steps to identify chips:
Pro-tip: To accurately identify chips, use a torch to cast shadows over the surface, making any irregularities more visible.
Methods for Repairing Scratches and Chips in Epoxy Flooring
Got scratches and chips in your epoxy flooring? Don’t worry! We will now discuss effective methods to repair them with finesse. This section covers filling and patching scratches, fixing small chips, and addressing larger ones. Our goal is to help you say goodbye to unsightly imperfections and keep your epoxy flooring looking flawless. So, let’s get started and explore these tried-and-true techniques for seamless repairs.
When it comes to repairing scratches in epoxy flooring, there are several steps you can follow to fill and patch the damaged areas:
By following these steps, you can effectively fill and patch scratches in epoxy flooring, restoring its appearance and durability.
To repair small chips in epoxy flooring, follow these steps:
1. Clean the area: Thoroughly clean the damaged area using a mild detergent and water. Allow it to dry completely.
2. Sand the chip: Carefully sand the edges of the chip to create a smooth surface. Use fine-grit sandpaper and be cautious not to damage the surrounding epoxy.
3. Apply epoxy filler: Fill the chip with epoxy filler, following the manufacturer’s instructions. Use a putty knife to apply and level the filler.
4. Allow it to cure: Let the filler cure for the recommended time, ensuring it is fully hardened before proceeding.
5. Sand and blend: Once cured, use sandpaper to smooth the filled area and blend it with the surrounding epoxy.
6. Clean and maintain: After completing the repair, clean the area and continue with regular maintenance to prevent further damage.
By following these steps, you can effectively address larger chips in your epoxy flooring and restore its functionality and aesthetics.
To maintain the long-lasting beauty and durability of your epoxy flooring, it is important to take preventive measures. In this section, we will explore practical ways to protect your flooring against scratches and chips. We will discuss implementing protective measures and the importance of regular maintenance. By following these guidelines, you can effortlessly maintain the pristine condition of your epoxy flooring.
To maintain the integrity of your epoxy flooring, it is important to take protective measures. Here are some steps to follow:
By implementing these protective measures, you can prevent scratches and maintain the longevity of your epoxy flooring.
Regular maintenance is essential for keeping epoxy flooring in good condition and preventing scratches and chips. Here are some steps to follow:
1. Clean the floor regularly by sweeping or vacuuming to remove dirt and debris. For a deeper clean, use a mop with a mild detergent.
2. Avoid using harsh chemicals or abrasive cleaners that can damage the epoxy coating. Stick to gentle, non-abrasive cleaners.
3. Place mats at entrances and high-traffic areas to prevent dirt and grit from scratching the floor’s surface.
4. Lift heavy furniture instead of dragging it, or use furniture sliders to prevent scratches and chips.
5. Periodically apply a sealant to protect the epoxy coating and extend its lifespan.
Remember, regular maintenance is crucial for preserving the appearance and durability of epoxy flooring. By following these steps, you can keep your floor looking its best for years to come.
To repair minor scratches in epoxy flooring, you can use a soapy water solution and fine-grit sandpaper. Apply the solution to the scratched areas and rub them with the sandpaper in circular motions until the scratches are no longer visible. Rinse the sanded areas, wipe them clean, and allow them to dry.
To prevent future scratches on your epoxy floor, consider placing padding beneath heavy objects and avoid dragging them across the surface. Additionally, you can apply a coating of urethane to provide extra protection against scratches.
If your epoxy floor is showing signs of discoloration, you can use a tinted sealer, water-based stain, or dye to address the issue. These products can help restore the original look of your floor and provide a uniform color.
To repair chips in epoxy flooring, you can either use mortar or an epoxy patching kit. Apply the chosen material to the affected areas and follow the instructions provided with the product. This will help fill in the chips and restore the smoothness of the floor surface.
If your epoxy floor has extensive damage, such as cracks, peeling, or significant discoloration, it may be necessary to resurface the entire area before applying new epoxy. This process will ensure a fresh and durable finish for your flooring.
Yes, it is recommended to seek professional help for repairing major damage in your epoxy flooring. Professionals like Epoxy Colorado have the expertise and tools to handle smooth epoxy repairs and ensure high-quality flooring applications. They can assess the extent of the damage and provide the most suitable solutions for your specific needs.
We Aim To Reply To All Enquiries With-in 24-Hours